Note: The following instructions are base on screenshots of the German version.
Make the following adjustments to use our news server:
1
Start MacSOUP. If you have already configured MacSOUP for another news server, close your current session by clicking the Ablage menu, then Schließen (close).
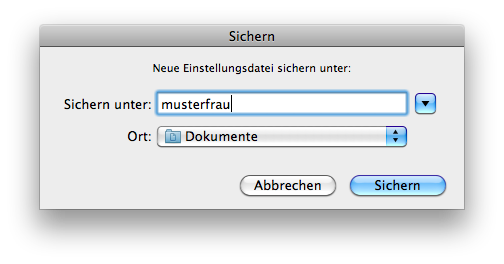
Either way, choose Neue Einstellungsdatei (new configuration file) from the Ablage menu next. The program requires that the new settings are saved using an arbitrary name. We will use musterfrau.
2
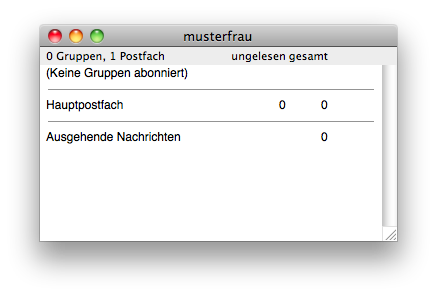
A window with the selected configuration's name will be shown.
3
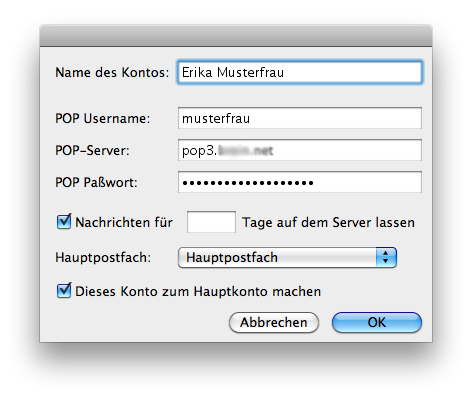
If you're using MacSOUP for the first time, you'll be asked for your email account and your sender details automatically. If you have already created an account, or want to use a different account, go to the MacSOUP menu and select Einstellungen (settings). In the settings window choose either New... to create a new email account, or Change... to amend already existing account settings.
E-Mail Account:
Enter an account name after Name des Kontos, your username on your email server after POP Username, your mail server's name after POP-Server and your email password after POP Paßwort.
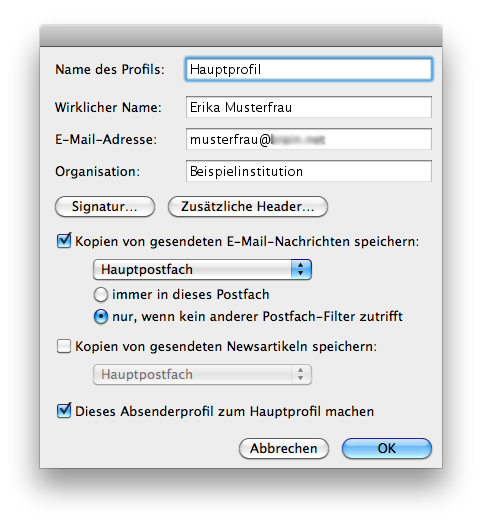
sender details:
Enter your real name after Wirklicher Name, and your email address after E-Mail-Adresse
4
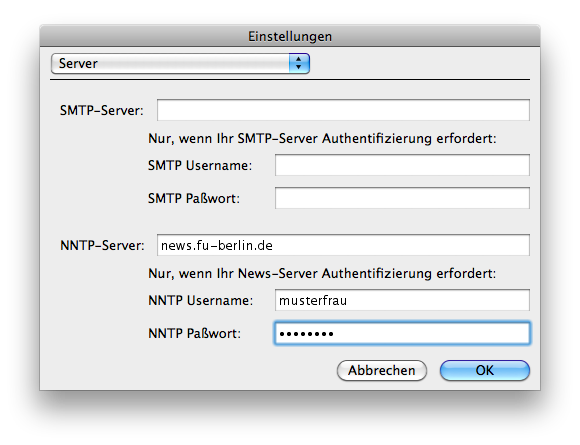
Then, select Einstellungen (settings) from the MacSOUP menu and switch to the Server pane using the dropdown box. Enter the news server name, that is News.FU-Berlin.DE, after NNTP-Server, as well as your personal username after NNTP Username and password after NNTP Paßwort (c.f. your registration email).
It is not necessary to enter a password as long as you're on campus at Freie Universität Berlin, or connected via VPN or WLAN (but excluding Eduroam at other universities).
Note: This password is not your general ZEDAT password, but a special News password, which is assigned on request.
5
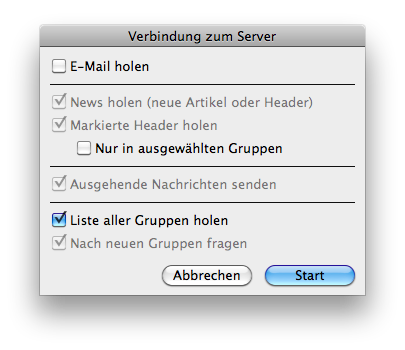
From the Spezial menu select Verbindung zum Server... (connection to server). Make sure that only Liste aller Gruppen holen (fetch group list) is checked and click Start. MacSOUP starts to fetch the entire list of groups.
6
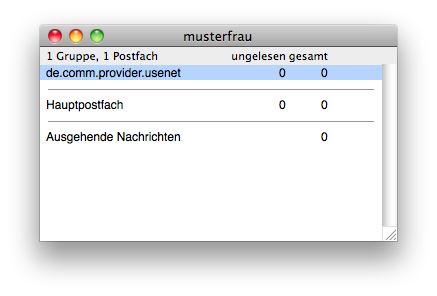
Select the group you wish to read by clicking its name from the list and dragging it into the overview window from step 2. Alternatively, select Neue Newsgruppe... (new newsgroup) from the Spezial menu and enter the name in the Gruppe field.

The group you just added will then appear in the overview window.
7
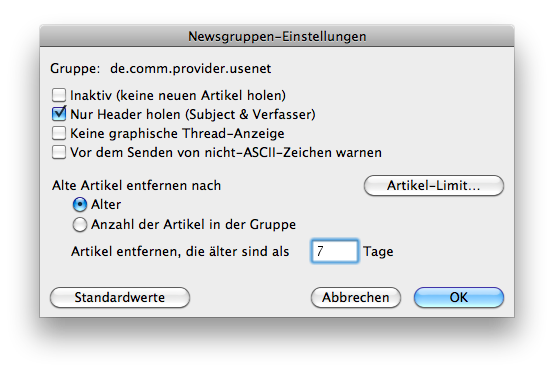
Set the properties of the group you wish to read via Spezial -> Newsgruppen-Einstellungen... (newsgroup preferences). We recommend to fetch the headers only, select Nur Header holen (fetch new headers only). All other settings can be left on their default. Confirm your settings by clicking OK.
8
Again, select Spezial from the menu, then Verbindung zum Server (connection to server). This time check News holen (neue Artikel oder Header) (fetch news - new articles or headers). You might want to check Nach neuen Gruppen fragen (ask for new groups). Click Start and MacSOUP starts to fetch the list of new messages.

9
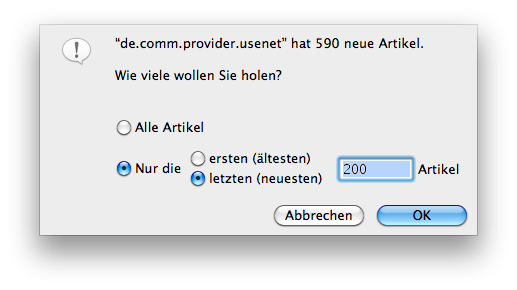
We recommend to fetch only the newest 200 articles as suggested.
10
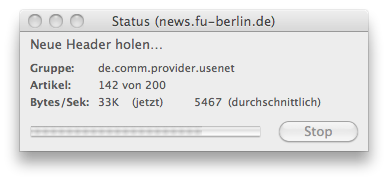
The headers of the articles are fetched now.
11
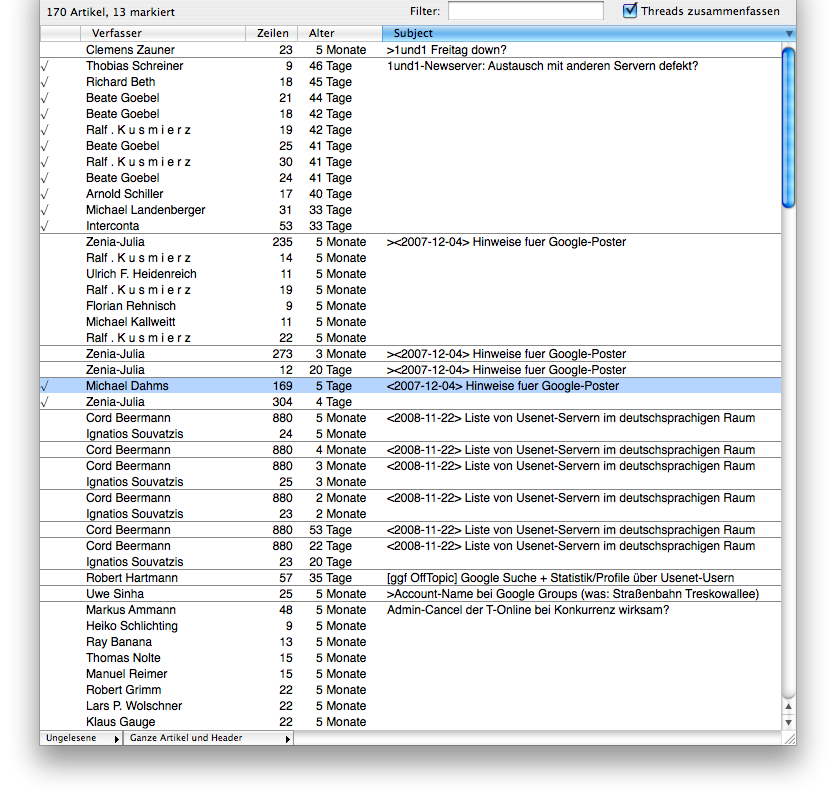
You can see the header lines of downloaded articles by double-clicking the name of the newsgroup in the configuration window (main window). Based on this data you can decide which threads should be fetched completely. Select the threads or articles you are interested in by checking the first column. A checkmark will appear.
12
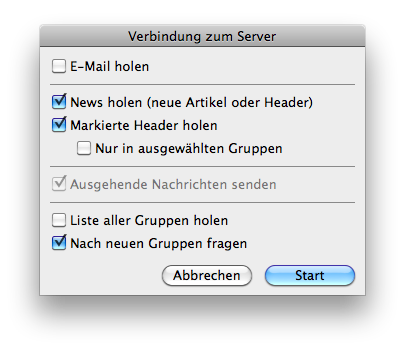
Again, select Verbindung zum Server... (connection to server) in the Spezial menu. In the dialog window at least Markierte Header holen (fetch selected headers) should be checked now. Other boxes might be checked if required. Click Start.
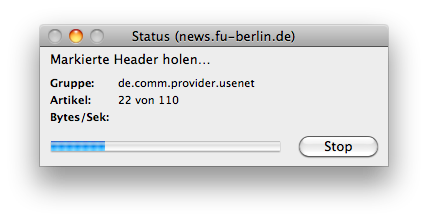
13
Now the selected threads and articles are retrieved.
14
You can read a retrieved article by double-clicking it in the message overview.

15
Click Beenden (quit) in the menu Ablage to exit the program.
16
If you are using this program on a computer that is not protected against unauthorized access you should erase the password before you exit. Else other people might post articles using your details.